

Welcome back to the Little Llama sew a long! A little reminder about the giveaway, etc. and then we'll get to sewing the llama, were going to make BIG progress today.
I will choose a random winner from Instagram and a random winner from Facebook who has posted a picture of their llama or llama in progress. Each winner will receive a 50.00 Jennifer Jangles gift certificate. The hashtag to use is #littlellamasoftie You can tag me on Instagram as well. For Facebook, you can tag me or post your photo to my Jennifer Jangles page. You can post as many different photos that you would like.
#littlellamasoftie
I will announce the winners on July 28th (2017) so if you can't sew day to day with us, this will give you time to finish up.
As we sew, if you have questions, you can ask them here in the comments and then when I answer, everyone will benefit from seeing the answer as well. And by all means, leave me a comment to let me know how your little friend is coming along.
Let's get started! Today is the sewing of the body, were going to make a lot of progress today.
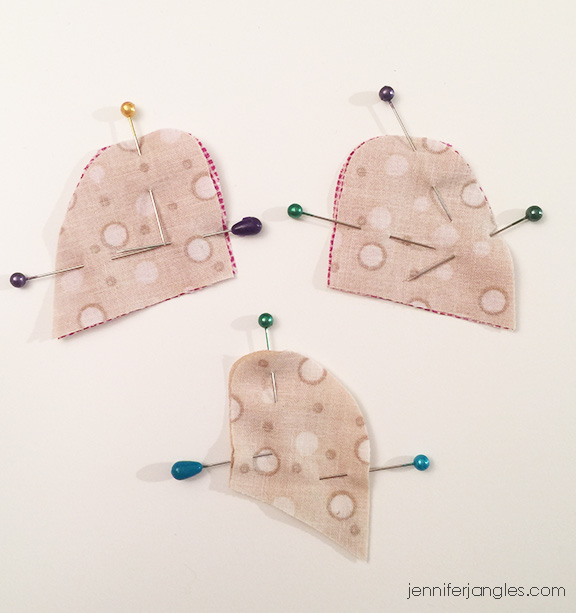
First up is ears and tail. Start by pinning the two tail pieces together with right sides facing. Next, align an outer ear fabric with an inner ear fabric. Pin with the right side of the fabric together and repeat for the second set of ear pieces. If you are using faux fur for your llama, do your best to tuck the fur into the center of the pieces as you pin. This will result in a fluffier tail and ears.

Sew, using a 1/4" seam allowance around all three pieces. Leave the straight edge un-sewn on the three pieces. Clip the curves and turn the pieces so the right sides are out. If you're curious about clipping, here is a video I made a while back on the subject.
And here is another video about turning small pieces, you might find it helpful as well.
Place the body fabric onto your work surface. Place the paper piece on top and align the edges. Place a pin into the fabric, at the edge of each leg marking.

Now remove the paper and place two legs onto the llama body in between the pins. Take note, that the legs have a flair on one side, use the paper pattern to guid you on placement.

Once you have the right sides facing and aligned with the sides, pin along the legs.

Now you will do the same for the remaining body piece and two legs. You'll want to flip the paper pattern piece over to align it to the second body piece. Once you have those legs pinned on, take both body pieces to the sewing machine and sew across the legs.

Now were ready for the ears. Use that paper pattern piece again to place the ears where they need to be. Once you have them arranged, remove the paper.

Next, flip the ears onto the body fabric facing down. The ear linings should be down on to the face.

Pin in place. Now follow the same steps to pin the tail onto the body where it needs to be. Were getting close to having a llama!

Place the right sides together of the llama bodies.

I like to start by aligning the legs and pinning around them. Continue around the body, pinning everywhere but across the straight part of the back.

If you are using a Minky fabric or something slippery, use lots of pins. Take them out just before they are about to go under the presser foot, this will keep your fabric from moving around.

Remember to tuck the fur in before pinning if necessary.

Sew around the outer edge all of the way around the body and legs, leaving the back open for stuffing. Once you have the body sewn, clip around all of the curves and corners. Turn right side out. Fill with fiberfill. Here's a video I made on filling with fiberfill you might find helpful for the llama.
Fill your llama with fiberfill and hand stitch the opening closed. With the opening on the llamas back, it will be hidden by the blanket. That way if you're not the best at hand stitching, you don't have to worry.
Were going to finish this llama up tomorrow with the blanket.
I hope you are having fun,
Jennifer
Need another project?
What about one of these? See more here.

Visit my Website, Etsy Shop, Blog, Facebook
No comments:
Post a Comment
Note: Only a member of this blog may post a comment.